Tuesday, September 29, 2009

Kusa Mahshi. Or in other words, Stuffed Zucchini

I’ve once again endeavored to try and replicate one of the recipes of my childhood: My mom’s famous Mahshi. What is seemingly a simple recipe – only a few ingredients – is actually quite time consuming and difficult to make. Though some might call it a labor of love! My dad sent me this description: In the Arab world, the stuffing of vegetables has its roots in the cookery of the early Islamic empire of the Abbasids in Baghdad, possibly learned from the Persians. Ottoman chefs perfected the stuffing of vegetables, and today nearly everything that can be stuffed is stuffed from artichokes to zucchini.

Making stuffed zucchini is a multi-step process, one I began this morning with my first cup of coffee, around 7:30am.

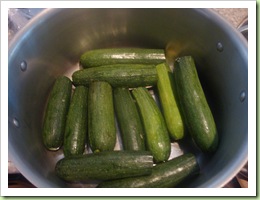
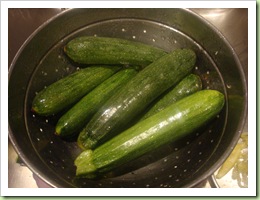
1. Remove the insides of the zucchini. Here was my starting point… one dozen perfect, locally grown zucchini:

DSC07758

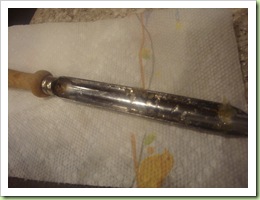
Removing the insides of the zucchini: The tool below is a zucchini corer. It will be your friend and enemy during the coring process.

DSC07760

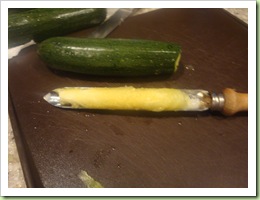
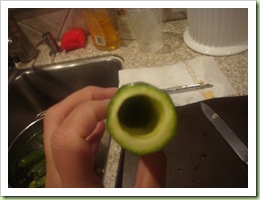
DSC07767 DSC07759 

The trick is to slowly rotate the corer, slowly digging deeper into the zucchini until you pull out the insides of the zucchini in one big soggy log. Sounds easy, but rest assured, it’s not. It’s easier than you think to poke a hole in those little suckers… holes that will later ooze your stuffing. It’s also very important to remove as much of the insides of the zucchini as possible. In the last picture above, I’m thinking I did a damn good job of emptying that zucchini. But alas, once cooked, most of my zucchini still had too much inside left – which contributes to a rather watery/soggy result. Better luck next time!

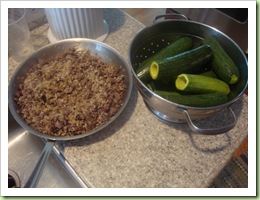
2. Yes, after all that, we’re only on step 2. Make the stuffing. Depending on how many zucchini you are stuffing, the amounts below will vary. I used a pound of ground beef (90/10)  and 1 1/2 cups of rice. Leftovers are great cooked up, just like regular rice. Saute the beef over moderately high heat, add salt, garlic powder, pepper and allspice. Generously. When the beef is cooked (no pink left over) and all broken up, add about a 1/2 teaspoon of cardamom and the rice. Mix all together… it will look something like this:

DSC07768 

3. Next you need to stuff your (cooled) stuffing into the zucchini. I like it… stuffing the stuffing. This, too, is a process that requires a delicate hand! My mom said the trick is to only put in enough stuffing so that you can stick your pinky in and reach the stuffing. Remember…. the rice will expand! You may need to shake the zucchini to get the stuffing to settle to the bottom.

4. Now it’s time to cook these little stuffers. Lay the zucchini in the bottom of a pot big enough to hold them in a single-ish layer.

DSC07769

Then blend a can (15 oz) of whole tomatoes and pour over your zucchini. Add about a cup of water to that, juice of half a lemon, and salt to taste. I had to use a little extra pureed tomato because I made such a large batch! Bring to a boil, cover, and simmer for about 45 minutes or so. You want the zucchini to be soft to the touch, but not falling apart. When the zucchini are done cooking, add one crushed (through a garlic press) clove of garlic.

5. Serve and enjoy!
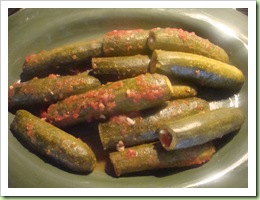
DSC07775DSC07779  DSC07778So, all told, it took the whole day to make my mahshi! I removed the insides of the zucchini at 7:30 in the morning. I made the stuffing after I picked up Erin from school 12:30. I stuffed and cooked them when we got home from picking up Josh at 3:00. Dinner was on the table by 5pm! What did I learn from this experience?

1)It will take a Herculean effort on my part to really remove enough of the stuffing so that my filling isn’t watery but without breaking through the skin of the zucchini. It’s damn hard!

2)My sauce could have used more salt.

3)I LOVE the way the house smells when the mahshi are cooking!

4) Nothing will ever taste exactly the same as when  your mother makes it!
Sunday, September 27, 2009

Cleaning out the Fridge

I’ve been working hard trying to make room for this week’s box of fresh produce! Here’s what I’ll be getting this Tuesday:

  • 1- 1 lb. Sweet Potato/Pecan Loaf
  • 5 lbs- Kennebec potatoes (Fresh dug)
  • 2 lbs- German Johnson tomatoes
  • 2 lbs- Carolina Gold tomatoes
  • 2 lbs- Zucchini
  • 1 lb-  Red Bell pepper
  • 1 lb-  Eggplant
  • 1 doz- Bi-color corn
  • 1- 3 Oz. Basil ( Varied types)

Does that sound good or what? I think I’m going to make some eggplant parmesan later this week with the eggplant. And I’m going to dip back into my Middle Eastern repertoire and stuff the big bunch of zucchini I picked up last week. I’m really looking forward to that challenge!

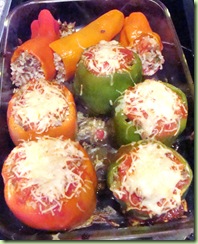
Last week I made stuffed peppers and a gi-normous BLT sandwich! I used some of the fresh basil from my garden to make a basil-mayo and spread that all over the sandwich. It was messy indeed! I used a recipe from Cooks Illustrated for the stuffed peppers.

DSC07699 DSC07694 DSC07695

Tuesday, September 22, 2009

Digging up Some Roots

So, I had an eggplant from last week, and another from this week… it was time to use those babies up! I’ve already turned previous eggplants into their ‘parmesan’ counterparts, so I was ready to try something different. Then inspiration struck! It was time to go old school! Being of Middle Eastern decent, I grew up eating some of the most delicious food imaginable. I don’t often try and replicate the dishes mom makes, because, well… you just never can! They never taste quite the same as when mom makes them. But I was craving a piece of home, so I decided to turn my eggplants into one of my favorite childhood dishes… Metlube (pronounced metlubeh).

It tastes better than it sounds! You can think of it as an eggplant and rice casserole! Basically, you get some stew meat (I like to buy the whole chuck roast and cut it up myself)  and brown it with salt, pepper, garlic powder and allspice (be generous with the spices!). Once the meat is nicely browned, add enough very hot water to cover, and bring to a boil. Let the meat simmer until it’s tender, about 30 minutes or so. About two minutes or so before it’s done, add about a teaspoon of ground cardamom. When it’s done, drain and reserve the liquid.

Meanwhile, peel and slice the eggplant (1 large or 2 small) and brush with olive oil and broil on both sides until slightly soft and nicely browned.

Now it’s time to bring it all together! Find a nice pot (about 6 quarts) that will allow you to lay a plate flat against the top… this will be important later! Scatter about 1/2 cup rice on the bottom of the pan. Then arrange the eggplant on top of the rice. Layer the cooked meat on top of that. Scatter another 1 1/2 cups of rice on top of the meat. Add enough water to the reserved cooking liquid to measure a generous 4 cups and pour over the eggplant/meat/rice. Bring to a boil, cover, and then reduce to medium heat for about 15 minutes. Turn the stove to low and simmer until all the water is absorbed… you’ll have to listen to it!

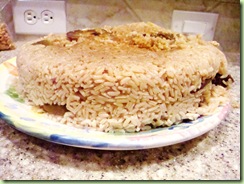
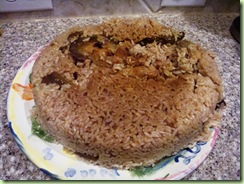
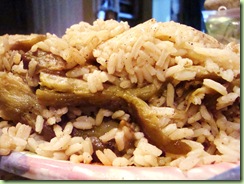
Let sit for about 15 minutes or so to settle. Then take the large plate I mentioned earlier and set atop the pot and flip over! You should have a cake-like concoction with rice cooked around layers of eggplant and beef! Voila!

 DSC07690 DSC07691

DSC07692

Serve the Metlube with tomato/cucumber salad and plain yogurt for an authentic Middle Eastern Meal!

What’s Fresh and Local this Week

Fantastic box of produce this week! I have some big plans for the goodies this week!

  • 3 lbs- Apples
  • 1- 4 oz Kudzu Blossom Jelly
  • 3 lbs- Tomatoes
  • 2 lbs- Zucchini
  • 1 lb-  Green Bell Pepper
  • 1 lb-  Eggplant
  • 1-  8 Oz. Lemon Balm
  • 2 lbs- White O’Henry Sweet Potatoes
  • 2 lbs- Red Cubanelle Peppers
  • 1 lb-  German Johnson Heirloom Tomatoes

There was a recipe included for Lemon Balm Lemonade that I promptly whipped up because it sounded so refreshing!! And we were not disappointed!

DSC07688

Friday, September 18, 2009

The Mall Birthday Party Feast

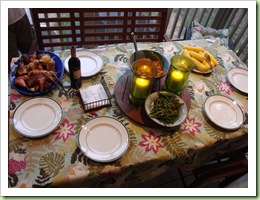
September is the month of Birthday in this family… 6 in all! Last night we celebrated all the Mall Birthdays with a feast! Almost everything we ate was a product of local farmers!

DSC07597

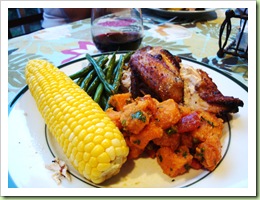
I butterflied (removed the backbone) two whole chickens and brined one in beer and the other just grilled with a Dijon/thyme rub. The birds were pasture raised in Rutherfordton county, and believe me when I say, the birds you get at the Teeter really shouldn’t even qualify as chickens! These are truly delicious!

I used the sweet potatoes and red pepper from my produce box to make a chili-lime sweet potato salad. And the corn… well, we decided to just enjoy it in all of it’s corn glory. A little note on the corn… this is one of the few times you DON’T want to add salt to the water. Add SUGAR instead and you will bring out the natural sweetness of the corn. Salt your corn right before serving!

I also made green beans with carmelized shallots. The beans were the only thing I made that wasn’t sourced locally.

DSC07603

And finally… the piece de resistance. The birthday cake. Chocolate cake with REAL butter cream frosting. Between the cake and the frosting – I used 8 eggs (and I won’t tell you how much butter). All the eggs came from pasture raised chickens in Rutherfordton county!

DSC07605

Wednesday, September 16, 2009

Time of the Season

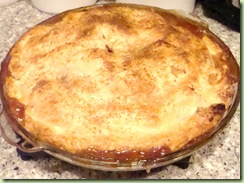
One of the beauties of the weekly produce box is being able to eat what’s in season! No more asparagus in summer!! No more tomatoes in January!!  So… what’s in season right now? APPLES! I stocked up on some Gala Apples and apple cider a couple of weeks ago, and turned it into this pie tonight… (from Fine Cooking)

DSC07589 DSC07583

Apple Cider Pie

For the double crust:
1 recipe Classic Pie Crust
3 Tbs. heavy cream
1/4 cup sugar cubes (about 12 small), coarsely crushed

For the filling:
3 lb. Golden Delicious or Gala apples, peeled, cored, cut into 3/4-inch slices, and then halved crosswise
2/3 cup apple cider
1/2 to 2/3 cup packed light brown sugar to taste
1 tsp. ground cinnamon
1/4 tsp. ground nutmeg
3 Tbs. cornstarch


Make the filling

In a large nonreactive pot, mix the apples, all but 2 Tbs. of the cider, the brown sugar, cinnamon, and nutmeg. Bring to a boil over high heat, stirring often, until the sugar has dissolved and the apples are evenly coated. Mix the cornstarch and remaining 2 Tbs. cider into a paste; add this to the apples. Stirring constantly, boil until the liquid is thickened and clear, about 1 min. (you're not cooking the apples, just thickening the juices). Taste and adjust seasonings if needed. Remove from the heat and let cool.

Assemble the pie

Position racks in the low and middle spots of the oven. Set a foil-lined baking sheet on the lower rack to catch drips and heat the oven to 425°F. Prepare a double pie crust in a 9-inch pie pan and fill the shell (see Classic Pie Crust). Brush the heavy cream over the top crust and sprinkle with the crushed sugar cubes, pressing lightly to secure the chunks. Cut at least three vent holes. Bake on the middle rack until the crust is golden and the apples are tender when pierced with a knife, about 55 min. If the top starts browning too quickly, tent the pie with foil

--------------------------------------------------------------------------------

And for dinner…

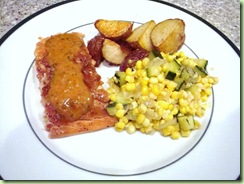
My in-laws are in town this week, so I decided to make a special dinner tonight, especially since they are going to watch the kids this weekend while Scott and I enjoy a weekend away! I made Salmon (wild Alaskan… also in season) with Red Pepper and Caper sauce, corn and zucchini saute, and roasted potatoes.

From my box this week I used the red peppers (roasted them in the oven to use them as the base for my sauce, rather than using jarred red pepper), corn, and zucchini.

DSC07587

Here are the recipes, also from Fine Cooking:

Cedar-Planked Salmon with Red Pepper & Caper Sauce

For the sauce:
1/2 cup jarred piquillo peppers or roasted red peppers
1-1/2 Tbs. sherry vinegar or red-wine vinegar
1/2 tsp. Dijon mustard
1 medium clove garlic, minced
1/4 cup extra-virgin olive oil
1-1/2 Tbs. brine-packed capers, rinsed and chopped
1-1/2 Tbs. finely chopped fresh flat-leaf parsley
Kosher salt and freshly ground black pepper

For the salmon:
1 tsp. granulated sugar
1/2 tsp. ground cumin
1/2 tsp. hot pimentón de la Vera (Spanish smoked paprika) or Hungarian hot paprika
Kosher salt and freshly ground black pepper
Four 6- to 8-oz. skinless salmon fillets (preferably at least 1 inch thick)
2 tsp. extra-virgin olive oil


Make the sauce:

Put the peppers, vinegar, mustard, and garlic in a blender and begin to puree. With the blender running, add the oil in a thin, steady stream. Transfer to a small bowl, stir in the capers, parsley, 1/2 tsp. salt, and 1/8 tsp. pepper. Season to taste with more salt and pepper if needed.

Prepare the salmon:

Soak a cedar plank in cold water for at least 1 hour and up to 12 hours. In a small bowl, mix the sugar, cumin, pimentón, 1-1/2 tsp. salt, and 1/2 tsp. pepper. Sprinkle the mixture over the salmon and let sit at room temperature for 30 minutes, or cover and refrigerate for up to 12 hours.

Prepare a two-zone fire on a gas or charcoal grill: On a gas grill, set two of the burners to high (one if your grill only has two burners) and leave one burner off. On a charcoal grill, push all of the lit coals to one side of the grill.

Set the cedar plank on the grill over the hot zone, cover the grill, and wait until the plank starts to smoke, 2 to 3 minutes. Meanwhile, rub the skinned sides of the salmon fillets with the oil. Slide the plank to the cooler zone and arrange the salmon on top, oiled side down and thicker ends closest to the hot zone. Cover the grill (vents open on a charcoal grill) and cook until the fish is almost cooked through with just a touch of pink in the center—make a nick with a paring knife in the thicker part of a fillet to check—or an instant-read thermometer inserted in a thick part registers 135°F, 10 to 14 minutes. Transfer the fish (still on the plank) to a serving platter and serve with the sauce.

-----------------------------------------------------------------------------

Corn, Sweet Onion & Zucchini Sauté with Fresh Mint

2 Tbs. unsalted butter
1 Tbs. extra-virgin olive oil
1-1/2 cups small-diced sweet onion, such as a Vidalia (about 7 oz. or half a large onion)
1 tsp. kosher salt; more to taste
1-1/4 cups small-diced zucchini (about 6 oz. or 1 medium-small zucchini)
2 slightly heaping cups fresh corn kernels (from 4 medium ears)
2 tsp. minced garlic
Scant 1/2 tsp. ground cumin
Scant 1/2 tsp. ground coriander
2 to 3 Tbs. chopped fresh mint
One-quarter lemon
Freshly ground black pepper


Melt 1 Tbs. of the butter with the olive oil in a 10-inch straight-sided sauté pan or Dutch oven over medium-low heat. Add the onions and 1/2 tsp. of the salt, cover and cook, stirring occasionally, until the onions are soft and translucent, about 5 min. Uncover, raise the heat to medium, and cook, stirring frequently, until the onions are light golden and shrunken, another 3 to 4 min.

Add the remaining 1 Tbs. butter and the zucchini. Cook, stirring occasionally, until the zucchini is slightly shrunken and almost tender, about 3 min. Add the corn, garlic, and the remaining 1/2 tsp. salt. Cook, stirring frequently and scraping the bottom of the pan with a wooden spoon, until the corn is tender but still slightly toothy to the bite, 3 to 4 min. (It will begin to intensify in color, glisten, and be somewhat shrunken in size, and the bottom of the pan may be slightly brown.) Add the cumin and coriander and cook, stirring, until very fragrant, about 30 seconds.

Remove the pan from the heat, add all but about 1/2 Tbs. of the mint, a good squeeze of lemon, and a few generous grinds of pepper. Stir, let sit 2 min., and stir again, scraping up the brown bits from the bottom of the pan (moisture released from the vegetables as they sit will loosen the bits). Season to taste with more salt, pepper, or lemon. Serve warm, sprinkled with the remaining mint.

Tuesday, September 15, 2009

A dozen corn… I don’t have that much dental floss!

I don’t know about you, but I get pretty sick of eating corn on the cob. I hate the feeling of all that corn stuck in my teeth! So, did some research and found some great ideas for corn once it is OFF the cob!! Here are a few of my favorites. Also, a corn ‘zipper’ really aids in getting the corn off the cob quickly! Here’s the one I use: http://www.chefsresource.com/kuhn-rikon-corn-zipper.html

If you don’t want to spring for a corn zipper, you can always use Paula Deen’s trick of putting a piece of corn in the middle of a bundt pan and using a sharp knife to slice off the kernels! Anyway, on to the recipes.

My very favorite corn recipe is this corn saute, from the magazine Fine Cooking! This recipe will also utilize the leeks found in this week’s box! Make this for guests, and they will keep coming back for more!

Corn & Mushroom Sauté with Leeks & Pancetta

2 Tbs. extra-virgin olive oil
1-1/2 oz. thinly sliced pancetta (4 to 5 slices)
3 Tbs. unsalted butter
1 cup small-diced leeks (white and light-green parts only, from 1 large leek)
1 tsp. kosher salt; more to taste
2 generous cups medium-diced cremini mushrooms (about 6 oz.)
2 slightly heaping cups fresh corn kernels (from 4 medium ears)
2 Tbs. chopped fresh flat-leaf parsley
1 to 2 tsp. coarsely chopped fresh thyme or oregano
Freshly ground black pepper
One-quarter lemon
3 Tbs. heavy cream


Heat 1 Tbs. of the olive oil in a 10-inch straight-sided sauté pan or Dutch oven over medium-low heat. Add the pancetta and cook, turning occasionally with tongs, until light golden and crisp, 5 to 7 min. Transfer the pancetta to a plate lined with paper towels, leaving the fat in the pan.

Increase the heat to medium and carefully add 1 Tbs. of the butter to the fat. When melted, add the leeks and 1/2 tsp. of the salt. Cover and cook, stirring occasionally and scraping up any browned bits from the pancetta, until the leeks are softened and slightly shrunken, 3 to 5 min. Uncover and cook, stirring frequently, until lightly browned, 1 to 2 min.

Add another 1 Tbs. of the butter, the remaining 1 Tbs. olive oil, the mushrooms, and the remaining 1/2 tsp. salt. Cover and cook, stirring occasionally, until the mushrooms are softened and a little shrunken (they will have given off a good bit of liquid), 3 to 4 min. Uncover and cook, stirring frequently, until the liquid evaporates and the mushrooms are lightly browned, 2 to 3 min. (the bottom of the pan will be quite brown).

Add the remaining 1 Tbs. butter and the corn. Cook, stirring frequently and scraping the bottom of the pan with a wooden spoon, until the corn is tender but still slightly toothy to the bite, 3 to 4 min. (It will begin to intensify in color, glisten, and be somewhat shrunken in size, and the bottom of the pan will be brown.)

Remove the pan from the heat, add the fresh herbs, a few generous grinds of pepper, and a good squeeze of the lemon. Stir in the heavy cream. Let sit a minute or two and stir again, scraping up the brown bits from the bottom of the pan (moisture released from the vegetables as they sit will loosen the bits). Season to taste with more salt, pepper, or lemon. Crumble the reserved pancetta over top and serve warm.

photo: Scott Phillips

So… that will get rid of about 1/2 dozen of your corn… what to do with the rest? Soup is always a great answer to using left over produce. There are all sorts of wonderful corn chowder recipes out there… but this is actually my favorite corn soup recipe, from Bon Appetit.

---------------------------------------------------------------------------------

Summer Corn Soup

Soup:

  • 3 cups whole milk
  • 3 ears of fresh corn, kernels cut from cobs, cobs broken in half and reserved
  • 2 tablespoons (1/4 stick) butter
  • 1 large onion, chopped
  • 1 large carrot, peeled, thinly sliced
  • 1 celery stalk, thinly sliced
  • 1 garlic clove, pressed
  • 2 cups water
  • 2 large fresh thyme sprigs
  • 2 fresh rosemary sprigs
  • 1 bay leaf
  • Ground white pepper

Garnish:
  • 2 thick bacon slices, diced
  • 1/3 cup fresh corn kernels cut from about 1/2 ear of corn
  • 1 green onion, thinly sliced
  • Pinch of cayenne pepper
  • Crème fraîche,* stirred to loosen

For soup:


Bring milk and corncob halves (not kernels) just to boil in heavy medium pot. Remove from heat, cover, and let steep while sautéing vegetables.

Melt butter in large saucepan over medium heat. Add onion; sprinkle with salt and sauté until translucent, about 5 minutes (do not let onion brown). Add corn kernels, carrot, celery, and garlic; cook until vegetables are soft, stirring frequently, about 10 minutes. Add 2 cups water, herb sprigs, bay leaf, and milk with corncobs. Increase heat and bring to boil. Cover partially, reduce heat to low, and simmer 20 minutes to blend flavors.

Discard corncobs, herb sprigs, and bay leaf. Cool soup slightly. Working in batches, puree soup in blender until very smooth. Strain into large bowl, pressing on solids to extract as much liquid as possible. Season soup to taste with salt and white pepper. DO AHEAD: Can be made 1 day ahead. Cover and chill.

For garnish:
Cook bacon in small skillet over medium heat until crisp. Using slotted spoon, transfer to paper towels to drain. Transfer to small bowl. Mix in corn, green onion, and pinch of cayenne. DO AHEAD: Can be made 2 hours ahead. Let stand at room temperature.

Rewarm soup over medium heat. Divide among bowls. Sprinkle garnish over, drizzle with crème fraîche, and serve. * Sold at some supermarkets and at specialty foods stores.

Keep checking back… I’ll be whipping up my SIL’s birthday meal this week and plan to use up as much of my fresh produce as I can!

What to cook tonight?

I see this blog as a service to all my Facebook friends… you no longer have to suffer through my numerous food posts… and worse, food pictures!

The real reason for this blog is to promote the Farmers Fresh Market – a group that brings locally grown produce to the Charlotte area.  All of the produce is grown in Rutherfordton county, NC and is picked the day before you get it… not the month before, like with what you get in your local supermarket!

Read more about it here: http://www.charlotteobserver.com/living/story/845453.html

I can’t say enough about how fresh and delicious all of the produce is, and that the money goes directly to our local farmers makes it that much better!

Having just organized a local drop off for my South Charlotte friends, I thought I’d post a few recipes that highlight some of the produce in this week’s box! Here’s what we got this week:

  • 3 lbs-     Sweet Potatoes
  • 1 qt-     Certified Organic Table Muscadines
  • 2.5 lbs- Tomatoes
  • 1 Bunch Leeks
  • 1 lb-       Red Bell Pepper
  • 1 Dozen- Sweet Corn
  • 2 lbs-     Zucchini
  • 1- Butternut Squash
  • 2 lbs-    Eggplant
  • 1 lb-     Cherry Tomatoes
  • 1 lb-     Sweet Banana Peppers